Should I Remove Paint or Wallpaper Before Wet Wall Drying?
When water damage occurs in your home or commercial space, one of the most pressing questions property owners face is whether to remove paint or wallpaper before wet wall drying. Acting quickly and correctly during this stage can make the difference between saving your walls and needing full reconstruction. In this guide, we’ll explain the reasoning, methods, and best practices to follow when addressing wet walls, along with how Structural Drying Australia can help restore your property efficiently.
What Happens When Walls Get Wet?
When water seeps into walls—whether from flooding, leaks, or burst pipes—it penetrates the paint, wallpaper, and drywall. This moisture can travel deep into the structure, leading to mold growth, bubbling paint, and weakened plaster or gypsum board.
Wet wall drying is the process used to remove that trapped moisture using specialized drying systems. If water remains inside the walls for too long, it can compromise structural integrity and create health hazards. That’s why early intervention and professional assessment are crucial.
Should You Remove Paint Before Wet Wall Drying?
One of the most common questions homeowners ask is: Should I remove paint before wet wall drying? The answer depends on the type of paint and the extent of water damage.
1. Water-resistant paints:
If your wall is coated with semi-gloss or enamel-based paint, these layers act as moisture barriers. While this is beneficial for protection under normal conditions, it can actually trap water behind the paint during a flooding or leak event. In these cases, it’s often necessary to remove sections of paint to allow airflow for efficient wet wall drying.
2. Water-based paints:
If your wall is finished with latex or acrylic paint, the paint layer tends to bubble, crack, or peel when exposed to moisture. These areas naturally allow air movement and can dry faster. However, any peeling or blistered paint should be scraped off before drying to prevent mold and ensure even drying results.
3. Professional assessment:
Experts from Structural Drying Australia use moisture meters and thermal imaging to detect hidden water pockets. Based on readings, they may recommend removing sections of paint to speed up the drying process or applying targeted heat and dehumidification without disturbing the surface if feasible.
Should You Remove Wallpaper Before Wet Wall Drying?
Wallpaper adds beauty to your interiors, but it can complicate the drying process when water damage strikes. Whether you should remove it depends on several factors:
1. Wallpaper acts as a moisture barrier:
Much like glossy paint, wallpaper traps moisture between itself and the wall surface. This makes wet wall drying less effective because air and heat cannot reach the damp materials underneath.
2. Mold and odor risks:
If wallpaper remains in place over wet walls, it creates the perfect environment for mold spores to thrive. Within 24–48 hours, mold growth can begin, causing unpleasant odors and potential health risks.
3. Paper vs. vinyl wallpaper:
-
Paper wallpaper absorbs water quickly and usually must be removed entirely to prevent deterioration.
-
Vinyl or laminated wallpaper resists water but traps moisture behind it, making removal even more essential before ceiling drying or wet wall drying begins.
Professionals will typically advise removing wallpaper before the drying process starts to allow maximum air circulation and prevent long-term damage.
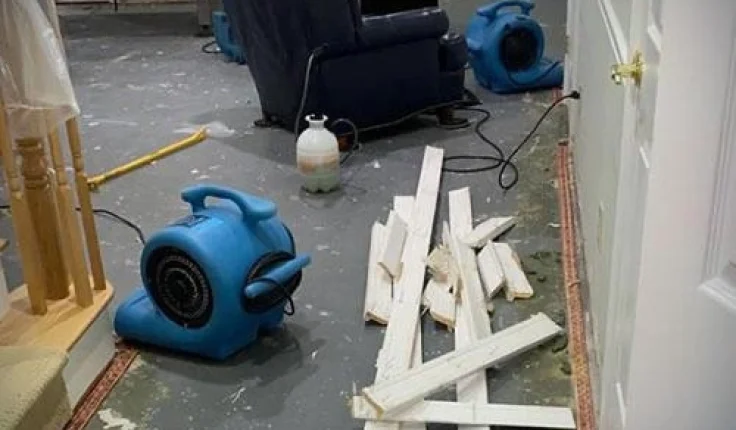
How Wet Wall Drying Works
The wet wall drying process uses advanced equipment such as dehumidifiers, air movers, and wall cavity drying systems. The goal is to evaporate moisture safely and evenly without causing further structural stress.
Step 1: Inspection and moisture mapping
Technicians inspect all affected areas, including hidden cavities and insulation. Moisture mapping tools identify how deep the water has penetrated.
Step 2: Paint or wallpaper removal (if necessary)
Depending on the materials and readings, partial or full removal of paint or wallpaper is carried out to allow better airflow and evaporation.
Step 3: Controlled drying
Using specialized systems like injection drying, warm dry air is pumped into wall cavities, speeding up evaporation while preventing secondary damage.
Step 4: Monitoring and verification
Technicians from Structural Drying Australia continuously monitor moisture levels until the walls are completely dry and safe for repainting or redecoration.
What About Ceiling Drying?
Ceilings often suffer from the same water intrusion issues as walls—especially in upper-floor leaks or roof damage. Ceiling drying is equally critical because trapped moisture can lead to sagging, staining, and mold growth above your head.
If paint or ceiling texture (such as popcorn finish) is present, professionals may remove or puncture small sections to improve ventilation. Removing paint or finishing allows heat and air to penetrate effectively during ceiling drying, ensuring even results and preventing future mold growth.
Can You Perform Wet Wall Drying Yourself?
While some homeowners try DIY drying using fans and heaters, these methods rarely remove moisture trapped deep within wall cavities. Incomplete drying can cause ongoing mold issues, bad odors, and hidden structural decay.
Professional wet wall drying uses advanced, safe, and controlled methods to restore your property thoroughly. Experts understand how to balance airflow, humidity, and temperature for the best outcome without damaging your walls or ceilings further.
Why You Should Trust Structural Drying Australia
Structural Drying Australia is a trusted name in property restoration and moisture control. Their team uses state-of-the-art drying systems, moisture detection equipment, and expert methods to deliver fast and reliable results.
Here’s what sets them apart:
-
Certified technicians: Trained professionals follow industry best practices for safe and efficient drying.
-
Advanced equipment: From desiccant dehumidifiers to injection drying tools, they handle even the most complex moisture situations.
-
Mold prevention: Their controlled drying process helps eliminate the conditions where mold can grow.
-
Minimal disruption: They aim to restore your space quickly so you can return to normal life as soon as possible.
Whether you need wet wall drying or ceiling drying, Structural Drying Australia ensures every part of your property is treated with precision and care.
How Long Does Wet Wall Drying Take?
The duration of wet wall drying depends on factors such as:
-
The extent of the water damage
-
The type of wall and paint or wallpaper used
-
The indoor humidity and temperature
-
The equipment being used
On average, most walls take between 3 to 5 days to dry completely with professional systems. However, walls with thick coatings of paint or vinyl wallpaper may require more time if those barriers aren’t removed.
What to Do After Drying Is Complete
Once your walls and ceilings are fully dry, it’s important to restore and repaint properly:
-
Sand the surface lightly to remove any residual flaking paint.
-
Apply a mold-resistant primer.
-
Repaint or reapply wallpaper only after confirming all moisture is gone.
This ensures long-lasting results and prevents future water damage from recurring.
Final Thoughts
So, should you remove paint or wallpaper before wet wall drying? In most cases, yes—removing these barriers helps ensure faster, more effective moisture removal. Paints and wallpapers often trap moisture inside the wall, making it harder to dry and increasing the risk of mold.
Whether you’re dealing with a flooded basement, burst pipe, or leaking roof, professional wet wall drying and ceiling drying services are essential for safe recovery. By choosing experts like Structural Drying Australia, you can rest assured that your property will be restored thoroughly, efficiently, and with long-term safety in mind.

- TAGS :
- wet wall drying
Related Posts

What Should You Look for When Buying Hyperbaric Chambers for Sale?
Andrin Andrin / June 25, 2026

How Do Complete Shower Sets Improve Your Daily Shower Experience?
Andrin Andrin / June 25, 2026

Recent Articles


ABOUT ME

I love to travel and then share my emotions with the readers. Thank you for following me on social media. Stay tuned for more updates!
Jenny Preston
ADVERTISEMENTS